No One Asked But Here’s A Brief Tutorial On Digital Underpainting And How It Can Add Some Extra Flavor


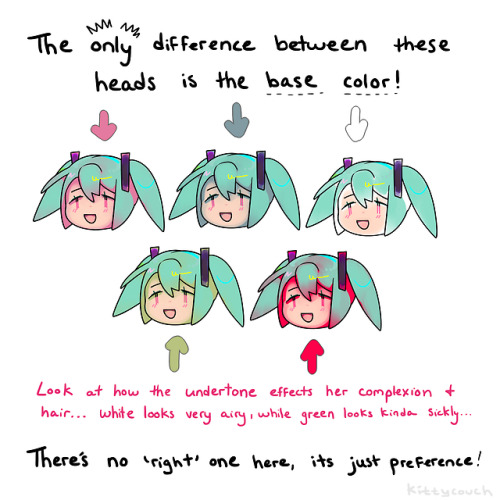

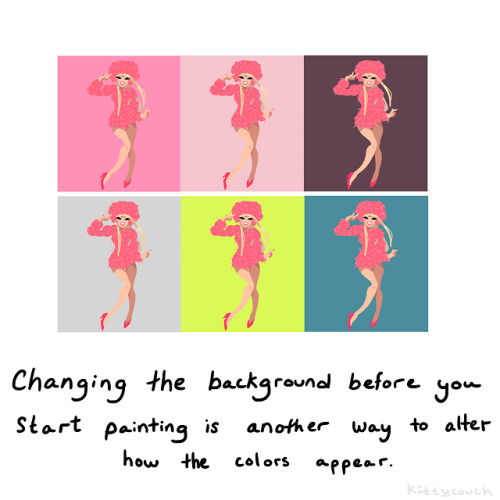
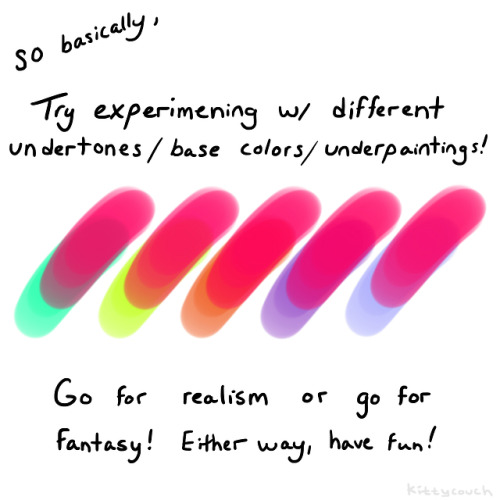
No one asked but here’s a brief tutorial on digital underpainting and how it can add some extra flavor to your art!
(I got asked this a couple times so just to clarify: I used “overlay” in the second slide… but the rest of these examples are JUST painted on, no effects! Try playing with the opacity on your pencil/water/brush tool to allow the base color to show through!)
More Posts from Nastysynth and Others

Some people were curious how I finish my 1H sketches so here’s a little tutorial ✨
Ps: just keep in mind that this is the result of super concentrating for 60min just drawing nothing else.

Process of one of my drawings of Ardyn!


The Back and Spine
I have two questions! First: have you ever thought of doing a tarot card suit for your characters? I think it'd work really well for them! And two: help me how do I draw legs
@gravitality
Hi!! I’ve absolutely been thinking about that, yeah, in fact I recently talked about that to my boyfriend just recently. It’ll likely happen after october! And to answer your second question! I made a thing on legs that i hope you’ll find useful!!
So. I’ve already explained basics on legs here, but I don’t think it hurts to go through some extra details to help you understand legs some more.

The very basic thing is to imagine legs as teardrops. Again, this has already been covered in said tutorial above, but I figured it’s still good to mention even the most basic thing that I know of. I still highly recommend you check it out to get in more detail and to see some other examples and practices that you do. But basically, think of legs in the shapes of teardrops, when it comes to shape. If you need a simple stick-figure to connect the legs in the first place, make sure that they bend at the knees a bit so that the legs don’t come off as stiff and unnatural.

As you can see, this method works perfectly for realistic legs as it does for stylistic ones. Remember to use these as a guideline, never to be the exact base of the legs you will be drawing. If you draw traditionally, remember not to draw these guides too hard, or they will be hard to erase/do freestyle!

But how do you actually draw out the legs without drawing them perfectly straight, as shown to the left? The trick is to add volume to them, and how you do that can be winged to your own liking. The idea is to think in curves. As no leg is perfectly straight. You may make these curves minimal if you don’t want them to be curvy, but keep in mind, still, that not even your own bones are perfectly straight, so it is highly recommended that you make them bend, at least a little.

It all depends on how you draw them as well. Say you put your legs together, as shown in this picture, what happens to the fat and muscle? Naturally, they press together, much like how thighs squish on the surface when you sit down (I’m sure most people know what I’m talking about). Make sure this shows in your art! This is very important to keep in mind, because it makes it all look more natural and believable. Try to cross your legs or stand up and sit down again for real-life examples!


The same applies for stretching your legs, more or less, except they appear to become more ‘hollow’ and slimmer. They become less soft to the touch, too, and might show. Try stretching your legs and feel where the muscles tense and where it feels ‘hollow’. This is very helpful with your art.

Many leg tutorials talk about legs without mentioning the behind. It requires a tutorial on it’s own, in all honesty, but this is the most simplest way to draw it connecting to the legs. Remember that it comes in many different shapes, and this is just a super basic guide! Two circles overlapping, while following the line and flow of the legs. Remember the muscle/fat as mentioned above!

Okay, so we got the basics of leg shapes figured out? What if you want o draw them in a certain pose, or with a certain silhouette, but perhaps do not have the reference for it? Or you want to blend your style into it? The key is to not shy away from doodling the form. Make mess, draw lightly and don’t care about the anatomy. That way you’ll get everything down without it appearing stiff. You can clean up the sketch later, always, and if you can, use a reference after you have drawn your pose, to correct your drawing.

Remember that the hips do a lot to the pose of the legs! Make sure they are in flow with your legs, so that it can look more natural. Remembers that hips ‘rotate’ with the spine.

I’ve talked about this method before when it comes to posing, and the same applies for the legs. One way to make legs appear ‘steady’ is to picture them standing in a line, and one of those legs need not to stray from the lines too much, making it steady. If you want a dynamic pose despite the steady pose, you can always have the other leg stray from the line, since it only matters that one leg is steady. This method can create good, casual poses without making them appear boring. (also notice how the teardrop shapes are used here, despite the highly stylized legs)

Do you want a highly dynamic pose, or them to appear unsteady, then skip the line entirely and make both legs aim away from it completely. As you can see, the legs appear more moving, in action, as if they’re fighting, falling, or dancing. As you can imagine, this is not a pose that one could stay steady on, suggesting that it’s taken mid-movement. More about posing and this ‘line’ method is talked about in this tutorial.
Hope this helped you, if you have any questions let me know, and if you’d like to check out all my tutorials they can be found here!


By Lettiebobettie

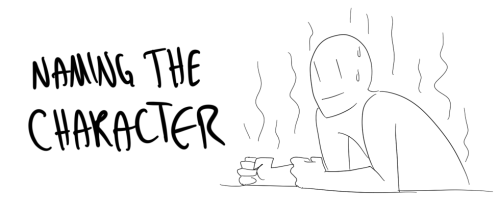
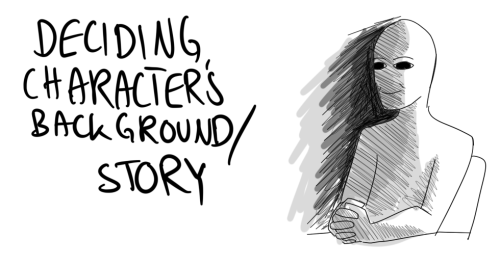
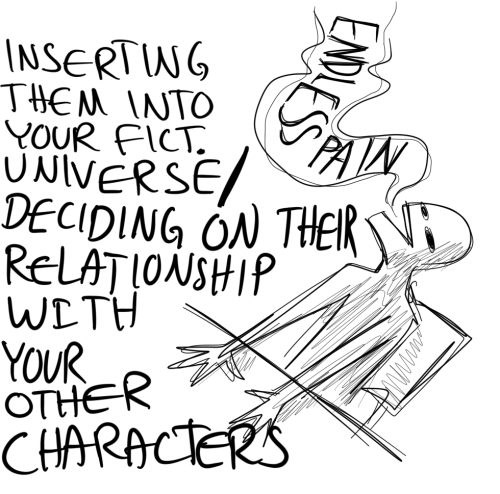
the suffering never ends

i am SO sorry for the super long response, but i thought this might make a nice little tutorial opportunity, since soft body physics can be… frustrating, to say the least. i’ve noticed that it tends to respond better to spherical meshes than most others, so getting it to work with something with a lot of hard edges and flat planes can be a little tricky (at least in my experience).
so! to get started, here’s my basic setup

the only thing i’ve done so far is place my object in the scene, along with a plane to act as the ground and a camera to record everything.
next you want to select your object, and in the properties menu on the right, select the physics tab (should be the very last one, the icon looks like a bouncing ball)

and for your object, you want to apply a collision and a soft body modifier (some people use rigid body instead of collision, so if you have issues with one there’s a chance the other might work out better. as for me, i usually stick to collision)

then select your plane and apply the collision modifier only.
now when you hit the play button at the bottom of the screen, this happens

it’ll just kinda float in place.
so to fix that, you select the object, go back into the physics menu, and look at its soft body settings

now uncheck the box that says “Soft Body Goal” (this’ll let gravity do its thing)

now when you press play after that

poor dude just kinda dies.
so there are a couple things i like to do to help it not… do… whatever that is.
go back into your object’s soft body menu and click on the tab that says “Soft Body Edges”

now underneath where it says “Collision:” you want to make sure that you have either “Edge” or “Face” (or both, why not live a little) applied to the object (this can help prevent clipping!)

we’re trying to make it wiggle n’ jiggle while still maintaining its shape, so what usually works for me is to crank up the “Bending” spring as high as it’ll go (which is 10) and enabling “Stiff Quads”

and we’re left with this!

and that’s how i do it! there are probably more efficient ways to get this effect, but for me

if you don’t mind me asking, how do you colour your art? like, step by step? your art looks really lovely


I made a tutorial!! :> this time I used my laptop instead of my phone so I can show what my actual art style looks like!
I tried to put as much detail in the pictures as I could about my process, but if you have any questions, then let me know and I’ll answer to the best of my ability!!! :D
LITERALLY the most Lynch thing i’ve seen
i literally love how your color and shade if it’s ok do you have any tips on digital coloring? you don’t have to answer this if you don’t feel like it :) thanks!!
hello friend!! i have a tutorial i made on twitter a while ago which is more or less how i make my colours more interesting. i still use the technique and in general it’s just a lot of colour adjustment nothing too special LOL here!!


-
 usagiwaffles reblogged this · 1 week ago
 -
usagiwaffles liked this · 1 week ago
-
 hikareblogs reblogged this · 1 week ago
 -
 sardonycal liked this · 1 week ago
 -
 lambofdawn reblogged this · 1 week ago
 -
 miel-miette reblogged this · 1 week ago
 -
miel-miette liked this · 1 week ago
-
 uptowntwunk liked this · 1 week ago
 -
 psybelle-draws liked this · 1 week ago
 -
 aeget reblogged this · 1 week ago
 -
aeget liked this · 1 week ago
-
 corvonautical liked this · 1 week ago
 -
 meowysprinkles liked this · 1 week ago
 -
 qokepetz liked this · 2 weeks ago
 -
 crystle-m3th liked this · 3 weeks ago
 -
 piophany liked this · 3 weeks ago
 -
 ja9une liked this · 3 weeks ago
 -
 honeyixi liked this · 3 weeks ago
 -
 justsomeectoplasm liked this · 3 weeks ago
 -
 hawkmothmoon liked this · 1 month ago
 -
 0reoliaflop69 reblogged this · 1 month ago
 -
0reoliaflop69 liked this · 1 month ago
-
 fckifndprsw liked this · 1 month ago
 -
 euelios liked this · 1 month ago
 -
 aurashire liked this · 1 month ago
 -
 bucky-liker liked this · 1 month ago
 -
 tinkeroni liked this · 1 month ago
 -
 maoyalikestowrite liked this · 1 month ago
 -
 kagikeys liked this · 1 month ago
 -
 batkinart liked this · 1 month ago
 -
 nuppa-reblog-blog reblogged this · 1 month ago
 -
 edgeyhappyhedge liked this · 1 month ago
 -
 artking-4 reblogged this · 1 month ago
 -
 nervousroach liked this · 1 month ago
 -
 raegangun liked this · 2 months ago
 -
lanakatte liked this · 2 months ago
-
 little-kitty-cookie25 liked this · 2 months ago
 -
 stormbori liked this · 2 months ago
 -
 ddragontheloud liked this · 2 months ago
 -
 pianomusicchild liked this · 2 months ago
 -
 archive-of-sorts reblogged this · 2 months ago
 -
 soffesiin liked this · 3 months ago
 -
 curlz-zy liked this · 3 months ago
 -
 yumepeachy liked this · 3 months ago
 -
 ladyofmisfortune reblogged this · 3 months ago
 -
 wxnn-g liked this · 3 months ago

Sylwester | i will mostly post sketches, because i'm too lazy to end them
196 posts